Description
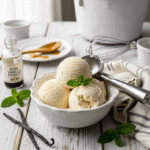
This easy homemade vanilla ice cream features a rich custard base made with real cream, milk, eggs, and pure vanilla extract. It’s incredibly smooth, creamy, and packed with genuine vanilla flavor—far superior to any store-bought version!
Ingredients
Scale
Ice Cream Base:
- 2 cups heavy cream (cold)
- 1 cup whole milk
- ¾ cup granulated sugar (divided: ½ cup + ¼ cup)
- 5 large egg yolks, room temperature
- 2 tablespoons pure vanilla extract
- Pinch of salt (about ⅛ teaspoon)
Optional for Intense Vanilla Flavor:
- 1 vanilla bean pod, split lengthwise and seeds scraped
Instructions
- Prepare Ice Cream Maker: If using a canister-style ice cream maker, make sure the bowl has been in the freezer for at least 24 hours before you plan to make ice cream. It needs to be completely frozen solid.
- Heat Cream Mixture: In a medium heavy-bottomed saucepan, combine 2 cups heavy cream, 1 cup whole milk, ½ cup sugar, and a pinch of salt. If using a vanilla bean, add the scraped seeds and the empty pod to the mixture. Heat over medium heat, stirring occasionally, until the mixture is steaming hot and sugar has dissolved completely. Do not let it boil. Remove from heat.
- Whisk Egg Yolks: While the cream mixture heats, whisk the 5 egg yolks and remaining ¼ cup sugar in a medium bowl until the mixture is pale yellow and slightly thickened, about 2 minutes. This is important for texture!
- Temper the Eggs: This is a crucial step to prevent scrambled eggs! Slowly pour about 1 cup of the hot cream mixture into the egg yolks while whisking constantly. This gradually raises the temperature of the eggs without cooking them. Once combined, pour the tempered egg mixture back into the saucepan with the remaining cream mixture, whisking constantly.
- Cook the Custard: Return the saucepan to medium-low heat. Cook, stirring constantly with a wooden spoon or rubber spatula, until the custard thickens enough to coat the back of the spoon, about 5-8 minutes. The mixture should reach 170-175°F on an instant-read thermometer. When you run your finger through the custard on the spoon, it should leave a clear path. Do not let it boil or the eggs will curdle!
- Strain the Custard: Pour the custard through a fine-mesh strainer into a large clean bowl. This removes any small bits of cooked egg and ensures silky-smooth ice cream. If you used a vanilla bean pod, remove it from the strainer (you can rinse, dry, and save it to make vanilla sugar or extract).
- Add Vanilla Extract: Stir in the vanilla extract and mix well. The vanilla flavor will be strong—this is perfect!
- Chill Completely: Cover the bowl with plastic wrap, pressing it directly onto the surface of the custard to prevent a skin from forming. Refrigerate for at least 4 hours, or preferably overnight. The custard must be completely cold (40°F or below) before churning. Cold custard churns faster and produces smoother ice cream.
- Churn the Ice Cream: Pour the chilled custard into your ice cream maker and churn according to the manufacturer’s instructions. This typically takes 20-30 minutes. The ice cream is ready when it reaches the consistency of soft-serve—thick and creamy but still soft.
- Freeze for Scoopable Texture: Transfer the ice cream to a freezer-safe container. Press plastic wrap or parchment paper directly onto the surface to prevent ice crystals, then cover with a lid. Freeze for at least 4 hours or until firm enough to scoop. For best texture, let ice cream sit at room temperature for 5-10 minutes before scooping if it’s very hard.
- Serve and Enjoy: Scoop into bowls or cones and enjoy your homemade masterpiece! This ice cream is best enjoyed within 2 weeks for optimal texture and flavor.
Notes
- Temperature Control: Cooking the custard to exactly 170-175°F is ideal. Below 160°F and the eggs won’t thicken properly; above 180°F and you risk curdling.
- Chilling is Essential: Never skip the chilling step! Warm custard won’t churn properly and will result in icy, grainy ice cream. Patience pays off here.
- Vanilla Bean Alternative: If using a vanilla bean, use 1-2 teaspoons of vanilla extract in addition to the bean for maximum flavor, not instead of.
- No Ice Cream Maker: You can make this without a machine by pouring the chilled custard into a shallow pan, freezing, and stirring vigorously every 30 minutes for 3-4 hours. It won’t be quite as smooth but still delicious.
- Texture Tip: Homemade ice cream freezes harder than store-bought because it lacks commercial stabilizers. This is normal! Let it soften at room temperature for 5-10 minutes before serving.
- Egg Safety: Use fresh, high-quality eggs and ensure your custard reaches at least 160°F to pasteurize the eggs safely.
- Prep Time: 15 minutes
- Cook Time: 10 minutes (plus 4 hours chilling, plus churning time)
- Category: Dessert
- Method: Stovetop
- Cuisine: American
Nutrition
- Serving Size: ½ cup (1/12 of recipe)
- Calories: 285
- Sugar: 15g
- Sodium: 45mg
- Fat: 22g
- Saturated Fat: 13g
- Unsaturated Fat: 8g
- Trans Fat: 0g
- Carbohydrates: 17g
- Fiber: 0g
- Protein: 4g
- Cholesterol: 155mg